Monday, June 17, 2013

The Agile Classroom?

One of the many habits I have throughout the school year, is to create a folder of links to articles and what not that I find interesting, but don't have time at that immediate moment to really "get into it".  When summer rolls around and I am watching the Reds, I will start to go through that folder and pick something that jumps out to me at that moment.

Since summer has started, my 5-year old girl has become nice and accustomed to waking up ate, leaving her pajamas on for half the day, and more general laziness than even I can tolerate.  So while the Reds were stomping on the Cubs, and the Spurs were stomping on the Heat, I decided to go through that list of links and came across this Lifehacker post about treating your kids like a team of agile program developers to lower family stress.  Already tired of saying the same things over and over to my daughter I watched the TED presentation by Bruce Feiler about a management method called agile development that has been in Silicon Valley for years, but he and other families have applied it to their daily family routines with some pretty positive results.  I could give you blow-by-blow details, but I think watching the video will give you a better understanding of how it works.
Overall, I think the overall messages from this talk are the most important.  Kids in my classroom are always looking to make a checkmark!  It is amazing the motivation a checkmark can do. Also, giving students input in how the classroom operates on a daily basis can empower the students to create meaningful accomplishments.  Lastly, I cannot stress the importance of "quick wins" in the classroom.  Testing culture has made students scared to do anything wrong in the classroom.  As an Art/Tech teacher, I want my students to embrace the "experimentation" aspect of my classroom and want to continue making students feel like they can push forward to try new things, knowing that wins and losses are fleeting, and that we can quickly move on knowing that we learned something in the process.

Some of the portions of this talk that I would like to put into place in my classroom might be a classroom manifesto, monthly meetings, and possibly checklists for each project that students can use to make sure they are focusing on the important aspects of the projects.  I'll keep you posted as I move forward with some of these ideas.

I will also keep you in the loop as I try this at home with a stubborn, but overall creative, sweet, and opinionated daughter who is always looking to make people happy.

Monday, June 3, 2013

Summa-time!

After what can only be described as the most hectic month in my life, May has ended and with the first of June comes summer break and my list of things I have wanted to work on all year is starting to take shape.

Business first.

Next year, the art department in my district is going to transition to OTES by creating Student Learning Objectives for visual arts.  My colleague and I spent a few PD days working on some ideas.  We are slowly going to transition by creating just one SLO for one class in one grade level.  This may sound simple, and I believe that it will be, but first, we must be able to generate baseline data from that one class to create a successful SLO that will show genuine growth from our students.  I have a lot of ideas which I will continue to share throughout the summer and beyond.

Along with the SLO's in visual arts, It will be my job to help the grade level teachers incorporate some of the common core standards that address technology into their curriculum.  I am blessed with having many tech savvy teachers in my building that are both willing to learn and also like to think outside of the box like myself.  Our first thoughts are to look towards interactive writing portfolios for the 3rd and 4th grades, but we will continue to discuss this over the summer to create some really interesting things for the kids to do during the school year.  More posts about that a certain to follow.

Now, on to my personal goals

My wife and I love to garden.  Our garden is getting bigger each year and now we are thinking about how we can get the most yield out of our small plots.  I am looking into creating an automatic watering system using Arduino micro-controllers and also continuing a woven sapling fence to keep the hordes of rabbits that like to eat our Swiss Chard.  Although, we really only plant the Swiss Chard because it looks pretty and it keeps the rabbits from eating the other stuff in the garden.  We are also looking into ways to arrange the garden to spend more time in it, like adding a seating arrangement or table where we can eat in the garden from time to time.

I started to replace all of the baseboards, trim, and doors in the house over spring break, but our busy spring schedule kept me from some finishing touches.  I hope to get all of that finished up as well.  There are lots of other small home improvement projects on my list that I won't bore you with here, but will share from time to time.

My daughter will be attending Kindergarten in the fall, and has a genuine love of books and wants to learn to read like right now, so some of the teachers in my building put together a little kit for me to start that process with her over the summer.  I want to capitalize on her intrinsic motivation now so that she enjoys reading as much as I do.  I also have several books myself I am hoping to power through this summer.  A healthy mix of education-related reading as well as some fun books that have sat on the shelf over the winter.  Ella and I will be spending the summer together for the first time (we had to keep her in preschool over the summer last year to save her spot for the school year) and we have a lot of just plain fun written out on our list to accomplish before school begins in the summer and I am looking forward to that the most!

In terms of my personal artwork, I am hoping to get back into some old school screen printing projects. Before I got my job with my district, I spent some time with several notable concert poster artists and created some of my own posters for bands.  I am thinking about building my own screen printing rig and getting back into the concert poster game because I have always been artistically inspired by music and the friends I made during that time were some of the most creative people I know.  Since moving back into education I have missed many of those creative conversations and look forward to re-igniting my creativity.

I hope everyone has a nice summer and I look forward to recharging the batteries and getting a head start to the next school year. I'll keep in touch all summer with everyone right here!

Monday, January 7, 2013

4th Grade Portraits Inspired by Modigliani

Last year, I ran across a lesson idea from another blog that I just had to try.  We were already doing a chalk pastel portrait using the Italian artist Armedeo Modigliani as inspiration, but I was having trouble trying to convey his style to the students.  By using white glue as a means to keep the chalk from spreading around and losing the form of the artworks, my 4th graders were able to follow the steps to creating their own, elongated forms for the head, neck, and shoulders of their self-portraits.  We discussed Modigliani's use of these elongated forms to create eye movement across the paper.  One of the main goals for an artist is to make a viewers' eyes move across the paper to create visual interest.  

Modigliani was excellent about giving what is usually a very static subject like a portrait more interest through his use of lines and shapes arranged on the paper.  The students began by creating a long, oval shape on their black papers and then started to add the neck and shoulders, trying to create visual interest by stretching the shapes in strange ways.

After tracing our lines with white glue and letting it dry, we were able to make a barrier to contain different chalk blends on the paper, keeping our portrait organized to accentuate our elongated shapes and visual interest points.  Hopefully, this lesson will be an excellent percursor to our future discussions about form and sculpture.


Wednesday, November 28, 2012

Setting up the iPads for intervention

Building iPad Wallpaper
Last spring, the technology department received 20 iPads from the PTO.  The reasons for purchasing these iPads was to use them in intervention settings throughout the building.

I have had an iPad for years and was on the verge to becoming a convert.  Then I had to manage more than one.  My feelings changed quickly.

I should have known after reading Steve Job's biography.  The term "single-user experience" took on a whole new meaning.  Apple wants everyone to own an iPad, not several people sharing one.  Apple has, however, complied with schools like us and has released enough tools to make it plausible, yet not nearly as easy as it should be, to set up iPads for multiple users to share.

Now my knowledge of all things Apple is limited, but I will share with you here the steps I used to set up different user profiles, added apps, and also planned the management of the iPads.  There may be an easier way, but I have found that this way works the best for our building (note: we work in a building with several technical limitations that I will describe throughout the post).

The iPads arrived in the spring.  Excited, an IT guy (the guy) and myself went to a training session about managing the iPads using the Configurator app.  The app is a tool that I believe Apple made after the fact for the iPads because it is clunky and not nearly as intuitive as most of Apple's offerings.  I am pretty sure that Apple created this app after demand for iPads in public environments became apparent. With that said, it still is not difficult to begin setting up profiles and backing up settings and creating an entire profile that does things like lock in-app purchases, password protections, other things you wouldn't want your child doing on the iPads.

After the workshop, I put together a method for setting up the iPads by taking home one of them, setting it up with the iTunes account, and then created a backup of the device.  Then, I was able to apply the backup to the rest of the devices.

Since then, The teachers using the iPads have found more apps and are beginning to find ways to supplement instruction and increase student achievement.  Now, we are dealing with the second phase of the implementation by creating several profiles for the iPads, making it reasonable to purchase apps in bulk and distribute to the grade levels that need selected apps that may not be appropriate for younger or older students.  This keeps app purchase costs down, but becomes a headache for trying to keep the different iPad profiles updated.

I set up three profiles.  Intervention, Primary, and Secondary.  After marking three iPads as the "master" for their selected profile, I can now copy selected iPads to their preferred profile and pass it on to the teachers for use.  We are still putting the final touches on this phase, mainly because:
1.  We lack a wireless network, so I must take the iPad home and do any updates or uploading there.  This simply just takes up time and adds a step or two to actually setting up the master profiles.
2.  Configuring apps is a pain.  You have to constantly keep checking which apps are checked in the list, or not even added to the configurator yet, adding more steps to an already confusing process.
3.  We have had constant troubles with the district iTunes account, so the account we use is a generic one I set up using my school email address.  Not ideal, but certainly easier to distribute apps.

Overall, using iPads in the classroom for intervention has been successful so far.  As we acquire more usability out of them through the use of wireless networks, I feel the sky is the limit.  Until then, we will continue using the iPads as best we can and I will continue to refine how and when iPads are updated and configured.

Tuesday, November 13, 2012

Tweeting Art

At the beginning of the school year, one of my goals is to get the students to become more reflective artists and discuss the principles and elements of art to enhance communication skills.  With the amount of time that we don't have available already, I was struggling with a way to get the students to talk more about their art without taking too much class time up.  Being the Art/Technology teacher, I dug deep into my technology tool bag and came up with an idea that will hopefully help me achieve my goal.

My Art Tweet
Twitter is becoming increasingly popular in educational circles.  Teachers are finding ways to incorporate the microblogging platform into their lessons in order to reach and engage students to participate and communicate using 21st century skills that will be beneficial to them in the future.

Twitter gives me just the right amount of characters to have students write about their art.  The 140-character format makes students think carefully about what they would like to tell others about the artwork and the process of creating it.  But, with standard Twitter rules, my elementary students are too young to have their own accounts, so I created one with the handle "MES artbot" and created a "worksheet" that gives students 140 blank spaces to add their art tweet.

After the students are finished with their tweet, I have them paste the half-sheet onto the back of their project.  Once that is done, I go through the projects in the morning and find a project with a great tweet.  Then, I take a pic of the project and post the tweet.  Here is what it looks like:


Monday, November 12, 2012

Close Encounters of the Google Drive Kind

Our district, like many, has made the transition to using Google Apps for Education.  I could go on all day discussing the benefits and limitations that GA's has for schools, but for this entry, I would like to focus primarily on how this impacts the elementary students in my building and how I decided the appropriate procedures for me to introduce GA's in the technology classroom.

How to teach GA's to an elementary student?  Well, there are many different scenarios that can be used.  Most importantly from a teacher standpoint, is that you are able to have some prior knowledge of what your student's skill levels are.  Not just in terms of technology skills, but especially in reading.  There is certainly a lot of reading that needs to be done in order to communicate the specifics within GAs.  One way that I have tried to eliminate the reading deficiencies, is to share with the students a sort-of textbook GAs presentation.  As we go through the unit on GA's, I can adjust and update the presentation and students can access it within their Drive from home.


The presentation will always be a work in progress as we continue to add new skills for using GA's.  However, this presentation allows students to access skills we have covered in class and gives them the ability to review the presentation from home or during classroom computer time.  The point is, they can review this on their own time and hopefully share this resource with their parents when they are working in GA's.

Why a Google Drive presentation?

I could have just as easily used a site to collect and share this information, but I thought it would be too cumbersome of a project.  Here, I can add a page for each skill easily without having to manage a whole site.  Also, I wanted to be able to put the presentation right in their hands, and not have them look for it.  By sharing the presentation, the students will be able to find it easily and use it while they are signed into their account.  I could have used a document, but Google does not allow videos to be embedded into their documents, only presentations as of now.

You have resources, now what next?

The first step, is to get students to log into their account.  We do have a district login web page, but I have taught the kids that from home the easiest way is to just go to Google.com and click the "sign in" button in the top corner.  Teaching the students this way gives them the knowledge that if they can access Google, then they can access their apps.

Student usernames and passwords were generated by our technology department, and I simply create cards with labels on them that students use in the technology lab.  Also, an extra card is made for the 3rd and 4th grade students that they can take home and share/use with their parents.

Next post:  Our First Google Apps Assignment

Monday, March 12, 2012

Smarthistory: Khan Academy for Art Teachers

Smarthistory, presented by the Khan Academy in collaboration with several museums, is a wonderful resource for art teachers looking to add some technology components into their lessons.  The website explains their purpose as:
Smarthistory.org is a free and open, not-for-profit, art history textbook. Part of the Khan Academy, we use multimedia to deliver unscripted conversations between art historians about the history of art.

My first impressions of this resource after stumbling upon the site while searching for video about Van Gogh's Starry Night are that this could be a great tool for the art teacher, especially at the Middle and High School levels.  Art and Art History are expansive topics, but the site organizes artists and movements through an interactive timeline making it easy to find what you need.
All of the features of the site are well thought out and highly organized.  The conversations, links, videos, and shared Flickr images give the art teacher multiple methods for presenting art pieces and explaining their significance to the art world.  Since I am an elementary art teacher, I would share with you that my students are not going to be browsing this site on their own due to the many nudes that are displayed in several different pieces, but the middle and high school teachers could probably let their students use this site for research as long as there is an understanding between the teacher and his/her students about how to approach such images in art.

Saturday, March 10, 2012

1st grade Fairy Tale Castles

The first graders started a unit on architecture and we discussed what I have found to be the best way to get kids psyched about architecture is to introduce them to castles and fortresses.

Why castles and fortresses?  Well 1st grade girls are immediately interested in anything that involves Princesses and castles.  The boys, however, take a little bit more effort to get them to think about castles so I use the "fortress" term and discuss the differences between a fortress and a castle (Castles are for royalty and fortresses are for protection and do not necessarily have royalty living in them).


We looked at different castles and fortress pictures on the big board and discussed the different elements that each one of them have to develop some criteria we could use to create our own castles and looked a diagram of a castle to get some more ideas.  Then, we discussed in detail the need for arched windows when building a castle with stone.

Next, we took a black sheet of paper and drew the front view of a castle using a white oil pastel.  We then cut out the castle drawn and learned how to fold our paper and use a snip of the scissors to make a hole in our windows to start cutting around and out.  After this, we broke out the sponges and a couple of different colors of paint to "stack" the bricks of our castle. 

Once the paint dried, we used colored cellophane to add windows.  To finish it off, we used a strip of paper attached to each bottom corner to stand them up.  I am thinking of lining them up in a display case with some string lights behind them to illuminate the windows.  Any thoughts?

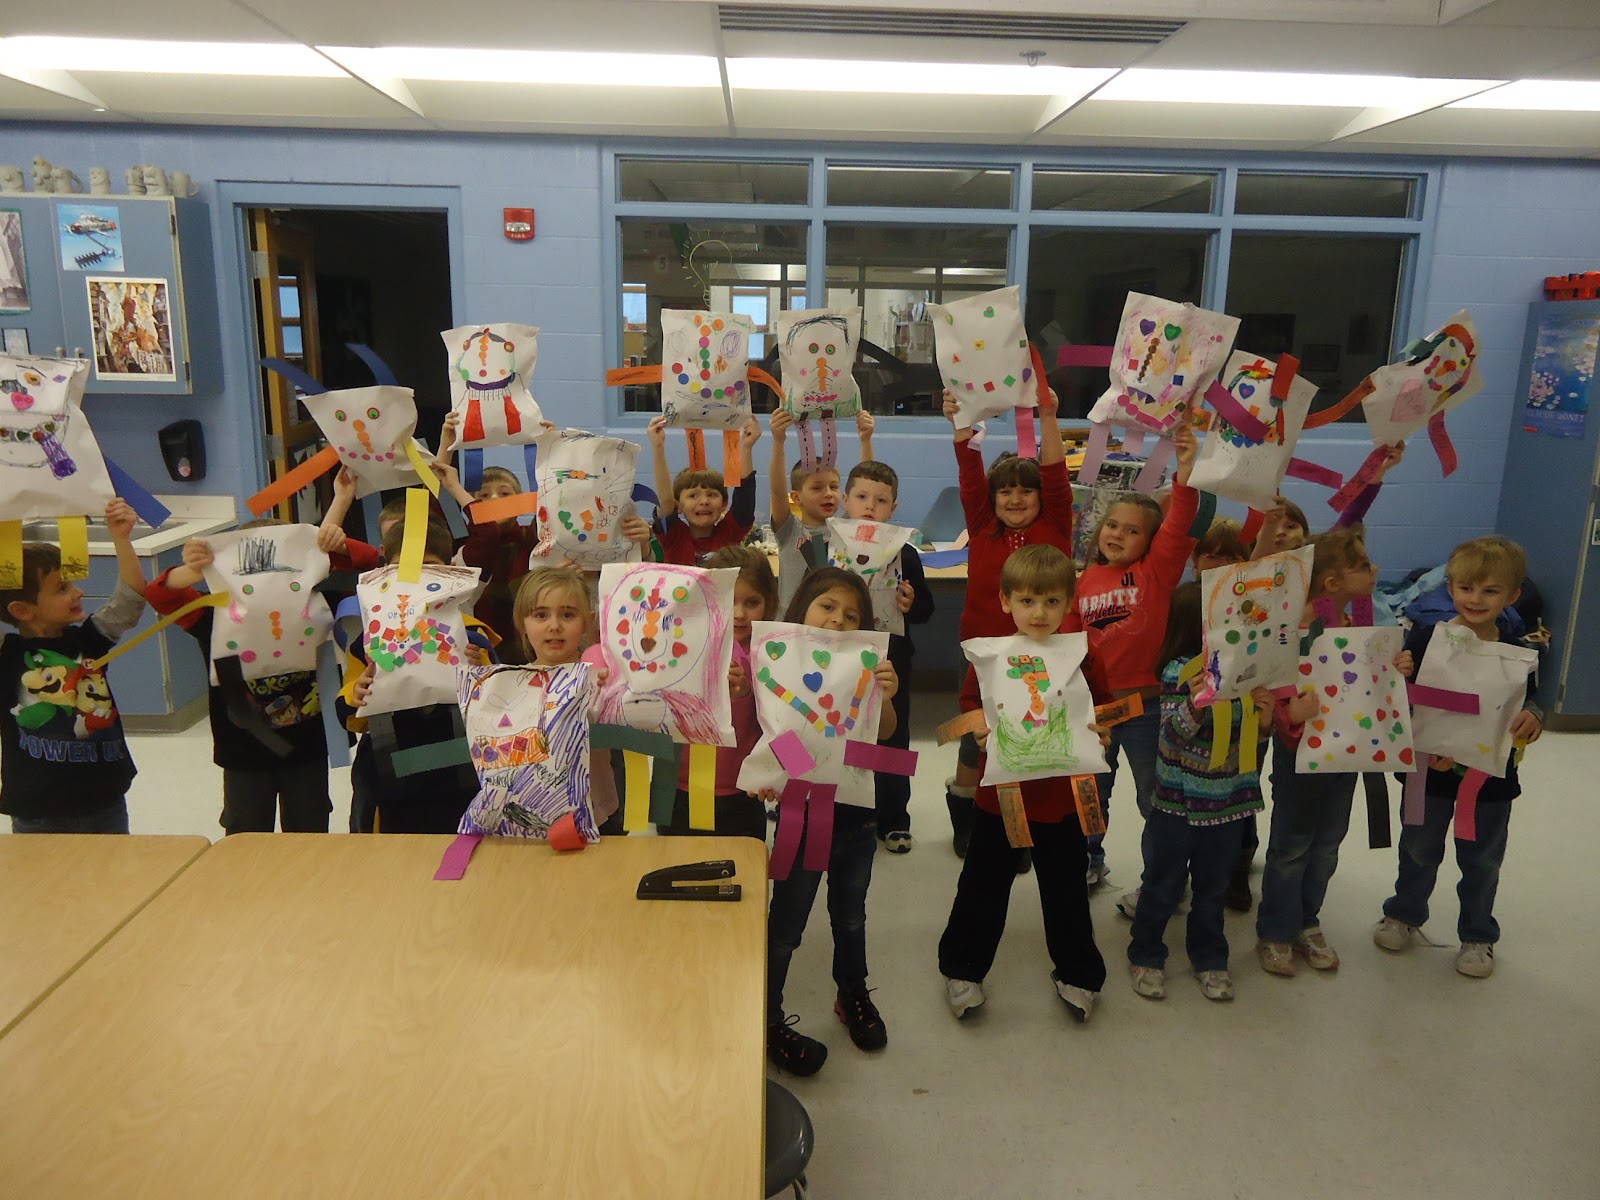
Kindergarten Machines

The Kindergarten students at MES have been working hard on our technology components of the curriculum for the last couple of weeks, especially discussing machines and how they are used to help people get jobs done.  We talked about how we do chores around the house and how some chores are fun and others not so fun.  Wouldn't it be great if there was a machine to do our chores for us?  What would it look like?  What kind of parts would we need to create that machine?  After a few ideas were discussed, we cut loose with different sizes of square paper and some old jigsaw puzzle pieces to build a machine that would help us complete a job we don't like to do.  The students jumped right on the task and began planning out their machines and gluing pieces of paper to the page to complete their machine.  After some gluing, we busted out the construction paper crayons (and some spakly ones too because machines are usually very shiny!) to add the details to their projects.  Take a look at some of the pics at the Kindies hard at work.

Monday, March 5, 2012

4th Grade Mechanimals

Two great things that go great together!  Biomimicry (from bios, meaning life, and mimesis, meaning to imitate) is an old concept gaining ground recently that studies nature's best ideas and then imitates these designs and processes to solve human problems. Studying a leaf to invent a better solar cell is an example. I think of it as "innovation inspired by nature."
I presented this Prezi presentation to the students:


Thursday, March 1, 2012

Thinglink: Interactive Images for your Classroom Pages

I can't believe I haven't talked about this web app yet!  Thinglink is a great little app that allows the user to create interactive images by simply copying and pasting links on top of the image to create a richer learning experience for the viewer as well as creating a one-stop location where teachers can add interactive content that students can access quickly and easily.

I use Thinglink so much as an art teacher, that I have just adopted it into my daily uses until I directed a friend (also an art teacher) to some resources I had in a specific content area.  She immediately asked "how did you do that?".  That was when I realized I must have found this gem and squirreled it away in my daily routine and never shared.

I can see this app being used for anything from explaining science concepts with links to demonstration videos to creating an instructional on how to make something where each component is tagged with a video on how to make the separate pieces.  I use it a lot in art class where we can add videos about the artist and the specific piece we are looking at, leading students to extended learning opportunities and expanded exploration of content.  Check out the one I made on Chihuly below.  The link to the Interactive pic is here

Wednesday, February 29, 2012

Make Writing More Fun: Little Bird Tales

Having trouble getting some of your more reluctant writers and editors to do some work?  Little Bird Tales
 is a free, web-based app that lets students upload their own pictures (or create in the editor), add text, and record original stories to share with their classmates and beyond.

Little Bird Tales has the functionality to create classroom accounts for free and is wonderfully motivating.  Students are very keen to the idea of creating their own stories, gathering works of art, and recording their stories to share.  The interface Little Bird Tales uses creates a welcoming environment for all students to encourage even the most reluctant writers to share their voice.

As an art teacher at heart, Little Bird Tales could be used to create student portfolios.  Uploading their own artwork and writing passages about their work or the teacher can generate prompts for each project.  something I am looking to try in the near future...I'll keep you posted!

Tuesday, February 28, 2012

Interactive Volcano Lessons

After watching some of our 3rd grade students work on Volcanoes in Science class, I started looking around for   some resources and interactive activities and found a blog post that discusses several great resources for students to use to learn more about volcanoes.  I initially started writing this post in the fall and just recently found the draft after I uncovered   Discovery Channel's Volcano Explorer which allows students to simulate and design different aspects of a volcano, like lava makeup and amount of gases contained inside.   When students make their selections the Volcano Explorer provides a short explanation of how those settings will affect the shape of the volcano and its eruption.

TED Talk: Why Videos go Viral

After my post about Mr. Peck's great video, I started to wonder to myself what makes a video go viral?  It didn't take long to find the answer.  In this TED talk, Kevin Allocca, YouTube's trends manager at a TED youth event discusses what he sees are the 4 reasons a video goes viral.

Friday, February 24, 2012

Learnzillion Common Core Math Videos

 Mastery Connect hosts an active community of teachers who are sharing lesson ideas built around the Common Core standards. Now you can also find more than 300 LearnZillion videos in the Mastery Connect community. 
All of these videos are tied to Common Core Standards from grades 3-9.   If you would like to add a video to your lesson plan, head over to the Learnzillion site and explore their offerings which also list the standard they are covering.  Most of them are recorded whiteboard lessons that are good for going over together as a class or individual review.  If you create a free account, you will be able to create video playlists and also connect and communicate with other members through comments and discussions on the pages.

Posterous Spaces: Great Tool for Classroom Content

I have heard of Posterous Spaces before, but this week is the first time I have had time to give the interface a whirl and try it out. My first thoughts are that this is just a fancy blog, but as I dive deeper into it, I see the benefits that Posterous can provide when used as a classroom management system and a one -stop-source for all of your assignments and content resources.  Posterous is a powerful and free tool for teachers and students to use to gather resources and document projects as well as communicate with other students, teachers, and parents to create a communal learning environment.

If you are thinking of using Posterous for a solution to online content management and coursework for students, here are some of the benefits that Posterous gives you:

  • Lots of templates:  Plenty of layouts to give your space the right look.
  • You can make as many spaces as you want.  Think of each space as a topic or a lesson plan
  • Add videos, audio, documents, etc...  Even Powerpoint slides can be uploaded.  The student never has to leave the site, all objects are converted and set to be viewed right in the space.
  • Comments:  Use the comments section in each space to extend learning opportunities and create discussions about the topic/lesson you are presenting.  Students love to post and participate in an online discussion.
  • Security:  Your spaces can be viewed publicly, or you can control permissions to the site, only letting students in.
  • Tablet users:  Posterous has an app that lets you do all of the work from your Ipad or Android device. Also students can view and participate on their tablets or smartphones.

Overall, I think Posterous has a place in where education is going today, providing a blended learning platform. Teachers and students can personalize their learning and develop 21st century thinking skills along the way by participating in web technologies that combine services and make creation of content easier and more effective.
Check out the test space I created in about 5 minutes here

Thursday, February 23, 2012

Animals that can help our little ones get ready to read

There are two sites I have hoped to share with you for while that can give our Preschool through 1st grade students some help getting ready to read.  The first, is Scholastic's Building Language for Literacy whiteboard-ready activities that feature Leo, the letter loving lobster, Reggie the rhyming rhino, and Nina the naming newt.
I have to thank a colleague of mine for finding Leo and his friends who give you three games to play either alone or as a group.

The next site is probably a little more for the younger students (my 3YO thinks it is the best) is Alphabetimals
which is a great resource for teaching letters and sounds.
As I sat down with this site open to look at, my daughter came running into the room and immediately sequestered my laptop and began flipping the interactive book, clicking on both the animal and word sounds.  Great illustrations as well as the ability to type in the box at the bottom of the site to see your words in alphabetimals letters makes for this a nice site for kids to work on their own with.


Wednesday, February 22, 2012

Here come the GERMS!

With the kind of winter that we have had so far, it is always a struggle to stay healthy with all the germs floating around looking to give us the next runny nose, cough, and occasional temperature.  That is why it is important for us in school to stay on top of the things we can do to keep ourselves from being sick.
As we all know, the best line of defense is hand washing.  After watching the first graders wash up for lunch after recess, I felt it was my duty to give them a few pointers on how to keep our mitts clean by washing our hands with lots of soap and water.  But how to incorporate that into an art lesson?  How about by studying the organic shapes of germs and then creating our very own.

After looking at some images on the web of germs and bacteria through a high-powered microscope, the students described the shapes by calling them "round-ish" and "spiky-like", I explained to the students the differences between geometric shapes (shapes with angles and straight lines) and organic shapes (shapes found in nature).  The students used a loop of yarn to adjust and fine tune the organic shape they liked most and then traced around the yarn with a pencil onto paper.

The students then used markers to add all kinds of yucky feelers and eyes on them, adding patterns and colors to create a germ worthy of the CDC's attention.  We used glue to draw lines and patterns on top of our artworks so that we could run over them with printing ink to create unique textures and shapes.  After they were all finished, we looked at Joan Miro's Harlequin's Carnival and talked about the creatures created from organic shapes in the piece.
Hopefully, all the kids got a little creeped out by the germs and will spend a little extra time at the sinks before lunch!


Tuesday, February 21, 2012

More Clay Projects: 3rd grade Coil bowls


Can you tell Mr. P. remembered to charge his camera battery or what?  Another finished round of clay projects from the 3rd graders who looked at the native American method of coil clay construction and then put their own twist on it by creating coil circles and pressing them into Styrofoam bowls to generate unique lines and textures onto the outside of their pottery.  Painting the bowls is always the favorite part for the students, who like to use the metallic and neon colors to add pop to their not-so-ordinary coil pottery.


What to do with a Bunch of Envelopes?

I am thankful that I work in a building and community where people ask the art teacher if they want something before they throw it away.  We love to recycle here in the art/tech labs and are lucky to have enough space to store all of the junk so bring in your tired, poor, huddled art supplies and we will accept them graciously and figure out a way to make something with them.
Perfect example:  Someone a couple of years ago donated nearly 1 a thousand white 14x10 envelopes.  We have used them for the usual storage of classroom resources, and the occasional ghost or two around Halloween, but this is the first time I ever thought about stuffing them!
The Kindies needed a good soft sculpture project that could tie into some of their standards, so I thought we might make snowmen out of the envelopes.  In hindsight, I could have given them more than 1 envelope and we could have made the sections of the snowman work, but the project turned into more of a Pillow Pet than a snowman.  When the kids actually are covering the goals you had planned for them, subject really isn't that important, so I went with it and it turned out to be a lot of fun.  The Kindies used markers and foam shapes to adorn the face and body region and then did the same to the construction paper legs and arms.  If we could have spent more time on them, I am certain we could have used construction paper scraps to add clothing and hats as well as hands and feet, but for the most part the kids had fun and learned some valuable sculpting skills along the way!